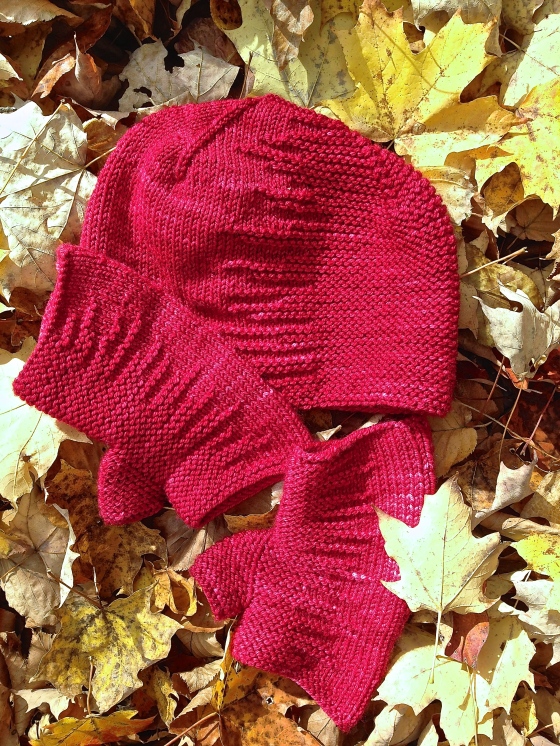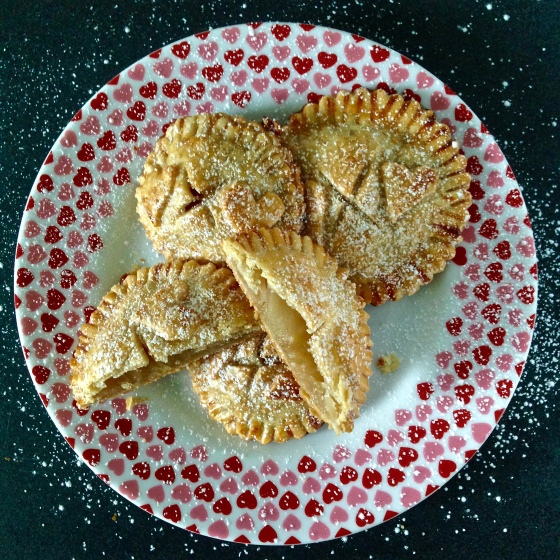
I thought I would add a little Valentine’s twist to a favorite dessert that we make at the Flat. I usually make an open apple galette (similar to this blueberry one), but this time I wanted to condense the cute into little hand pie sized treats.
I know this may raise a few eyebrows- especially from Florrie!- but I am absolutely the worst when it comes to making pie crust from scratch. I have hot little hands, and I usually over knead and over work the dough and it comes out dry and hard and sad. So I cheat. That’s right. I’m a big fat cheater and I don’t care who knows it. Pillsbury ready made pie crusts are my dirty little secret. Don’t tell anyone, ok? But I do put in extra effort to make the little pies as pretty as possible! Redemption? I hope so. Here’s what you’ll need for the filling:
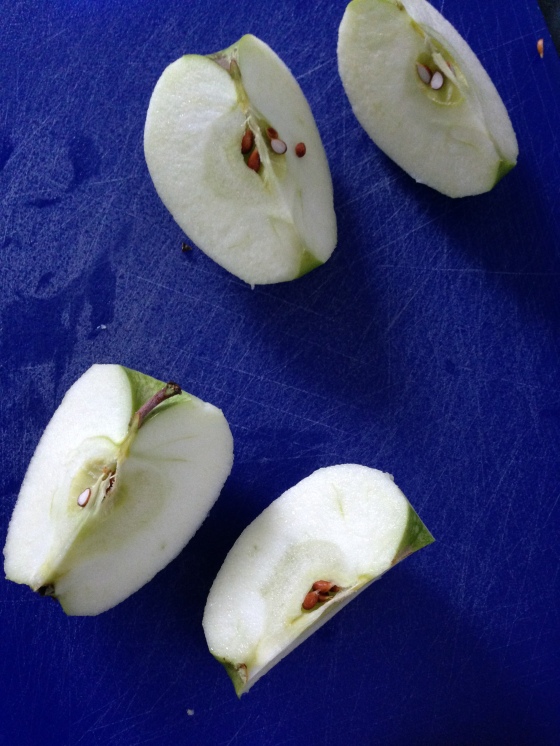
2 largish Granny Smith Apples, peeled, cored, and sliced thinly
Zest of 1 lemon
Juice of 1/2 lemon
1/4 tsp Ground Ginger
1/8 tsp Nutmeg
1 tsp Allspice
dash of Ground Clove
1/4 cup Granulated Sugar
1 tbsp Brown Sugar
1 package of Pillsbury Refrigerated Dough (two crusts)
1 egg
2 tbsp milk
2 packets of Sugar in the Raw Cane Sugar
Start by preheating the oven to 350 degrees F.
Wash, dry and zest the lemon, juice half of it. Pluck out any lemon pips and put the zest and juice in a large mixing bowl. Peel, core and slice the apples uniformly. You want them to be thin so that they cook evenly all the way through, but not paper thin or they’ll cook down into mush. I like to use my large slicer blade on my mandolin to get them really uniform. Just watch your fingers please. Don’t be like me and slice the tip of your finger off. Ahem.
Add the apples to the mixing bowl, along with all the sugar and spices (yes you can add cinnamon- if you MUST) and mix it well. Set aside and prep your dough.
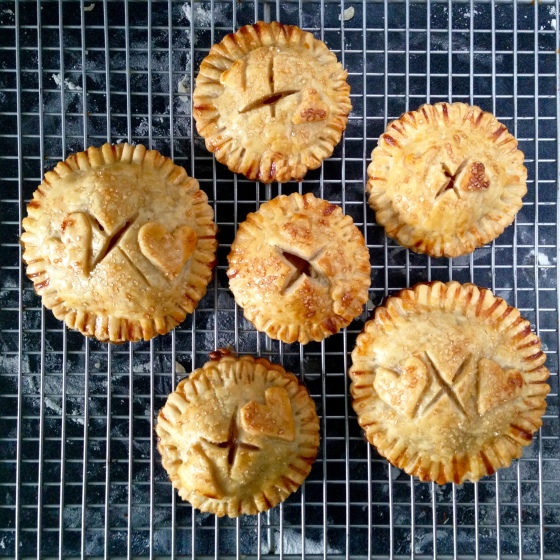
Lightly flour your surface and roll out the dough. Use a circular cookie or biscuit cutter to cut out rounds. I did two sizes, and I used the fluted side cause- cute, right?! Just make sure you cut two of the same size for each pie.


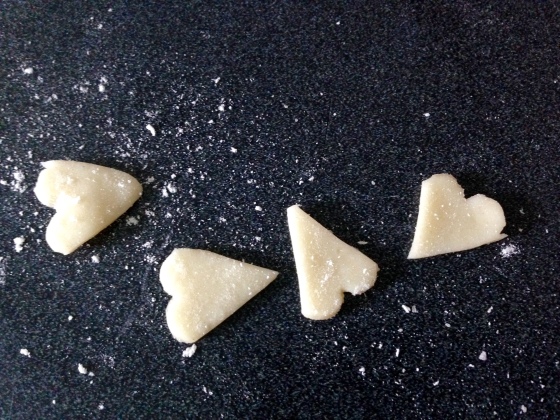
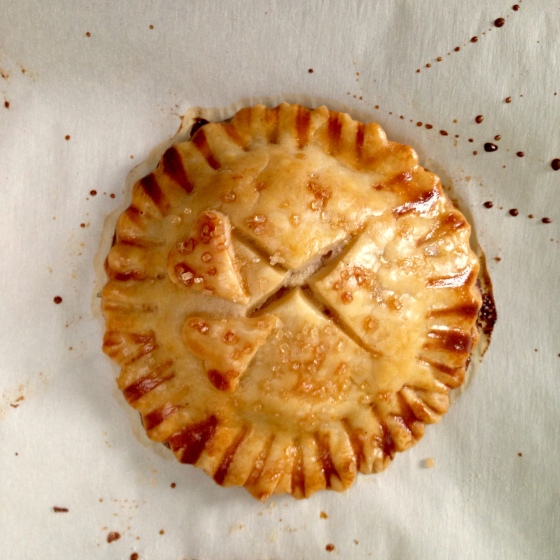
I also cut out a bunch of small circles using the fluted side, then I sliced each round like a pizza and the fluted edge made tiny little hearts for me to decorate the pies with.
Lay out the bottom half of your pies and put a heaping tablespoon of filling on each round. Try to keep it mounded in the middle, leaving a good amount of crust around the edge so you can easily seal it.
Wet your finger with a bit of water and run it along the edge of the bottom crust. Lay the top crust over the filling, matching edges, and use a fork to press the edges closed. I pressed the biscuit cutter over it once again to neaten up the fluted edges. Use a sharp knife to cut an X in the pie top. Wet one side of the tiny heart crust decorations and gently press them on top of the pies.


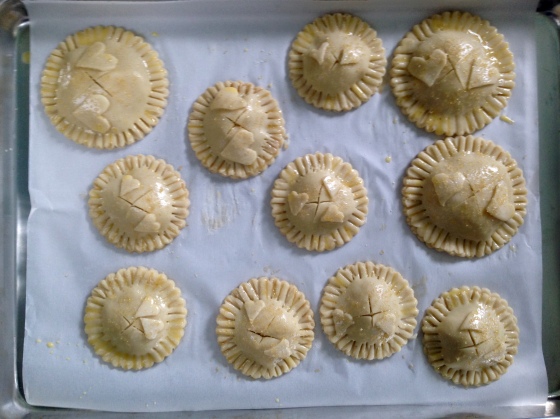
Line your baking sheet with parchment paper and lay each pie out on it.
Beat the egg together with the milk (you can use water if you don’t eat dairy) and with a pastry brush give each pie a good brushing. Lightly sprinkle some of the cane sugar on top of each pie. I like the cane sugar because it’s got big crystals and I think it looks very pretty after baking, but you can use table sugar too. Pop them into the oven and bake between 20-25 minutes or until they are a gorgeous golden brown and the filling is bubbling.
Cool on a rack. You can serve dusted with powdered sugar, a little ice cream or chocolate shavings, cheddar cheese, whipped cream (ummm how about a maple bourbon whipped cream?)- however you love your apple pie served. If you make them we would LOVE to see your pictures. #kniteatrepeat on IG so we can see your handiwork. Enjoy!

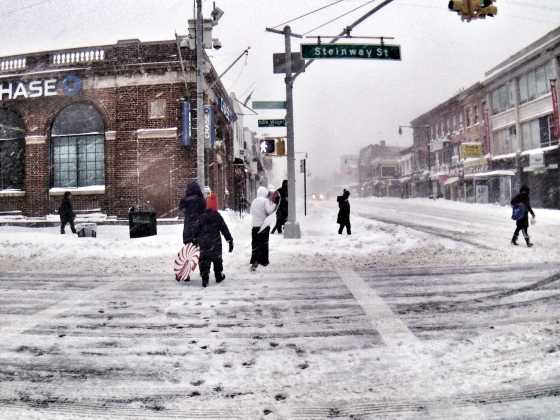 My little neighborhood in Queens was buried under over two feet of snow yesterday- so I rummaged through the pantry to look for something to eat, as one does in such a situation. I like quinoa, but if it’s cooked with just water it can be pretty bland and I need some flavor in my life. Allow me show you how I like to cook it.
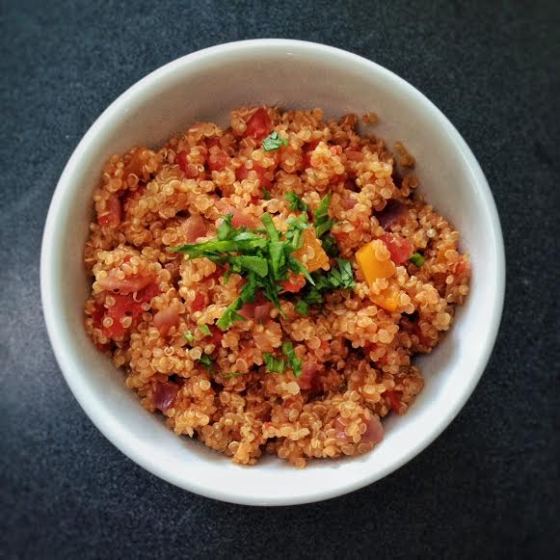


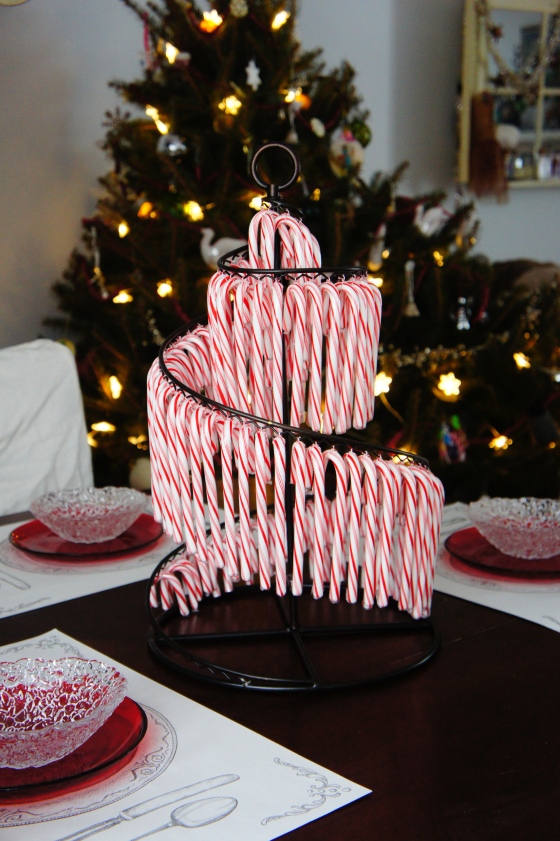
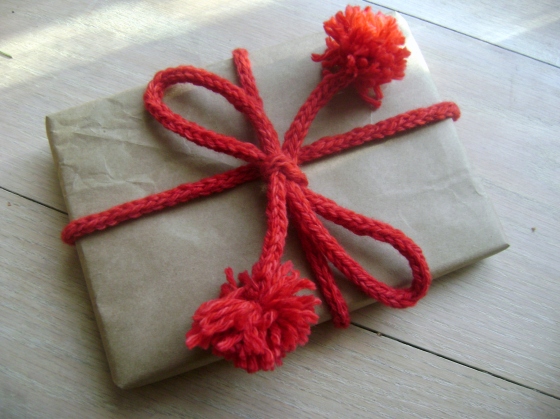
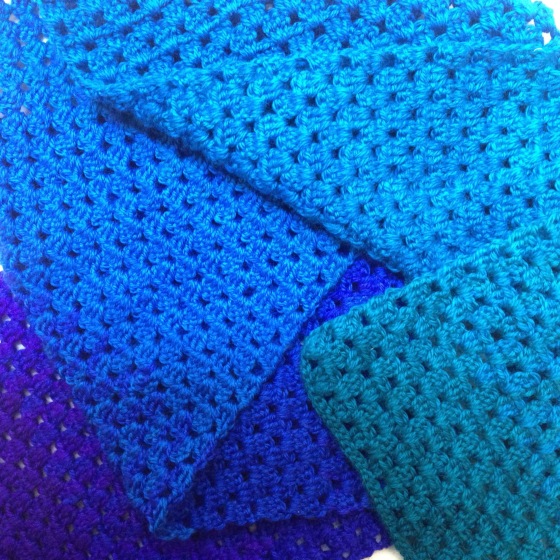
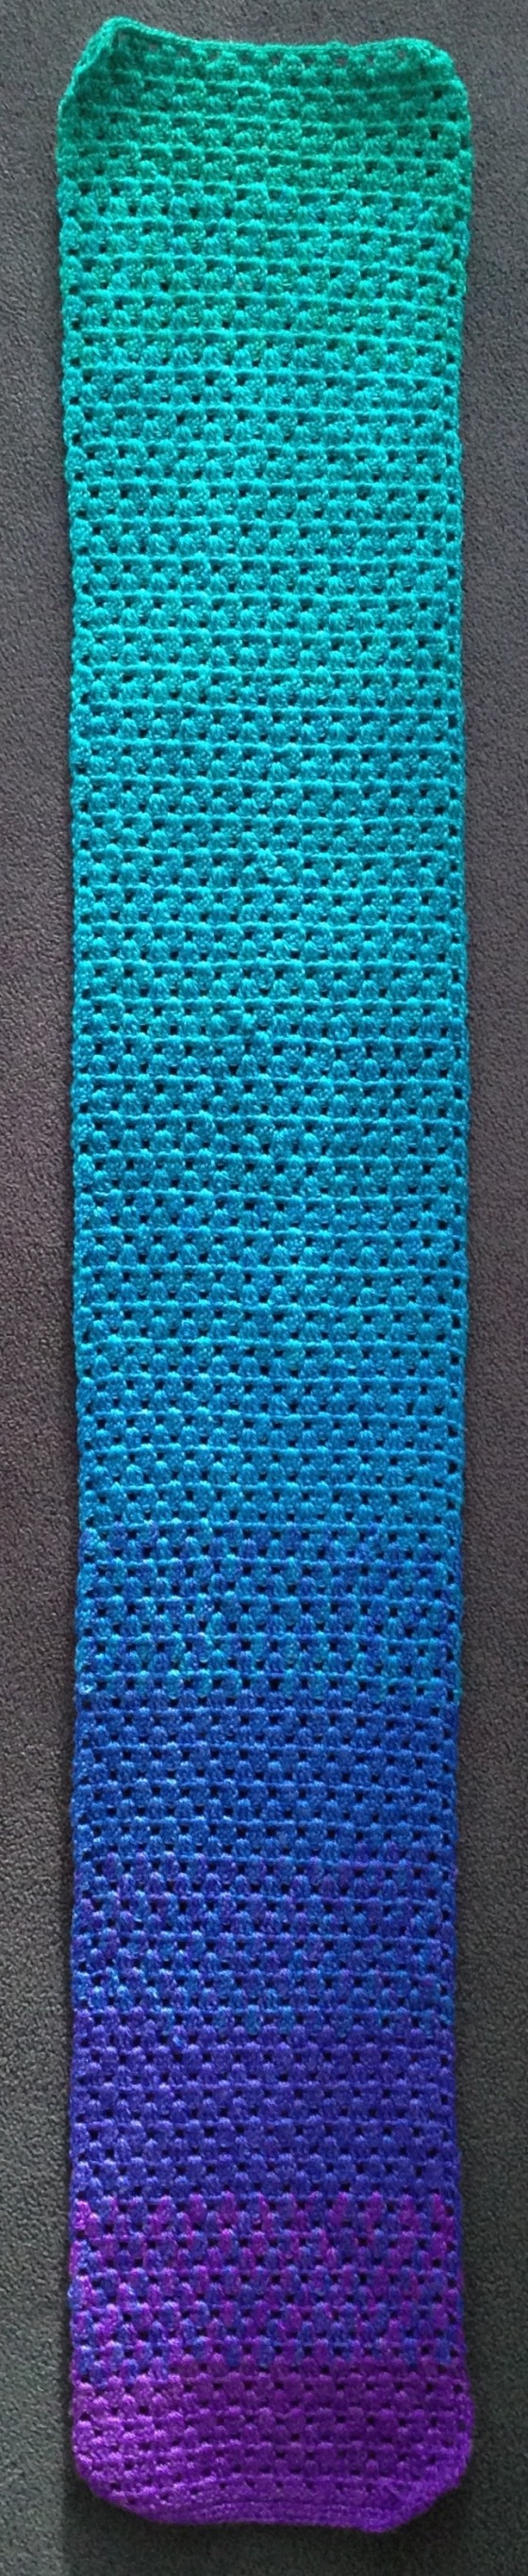
 I was feeling the holiday spirit tonight and scrolling through our FloMa media library. I was reminded of so many of our past holiday posts. It’s easy to forget that we’ve been blogging here for this many years already and I couldn’t help but feel proud of all the things we’ve done in that time. I decided to do a little round up and put some of my favorites here.